Table of Contents
- Getting Started with Hexo
- Choosing a Theme with Hexo - Next
- Deploying with GitHub Pages
- Publishing Content
- Math Test
Getting Started with Hexo
First, install Hexo globally:
npm install -g hexo-cli
Then, initialize ourproject in an empty folder:
hexo init
npm install
To build our first page, we run:
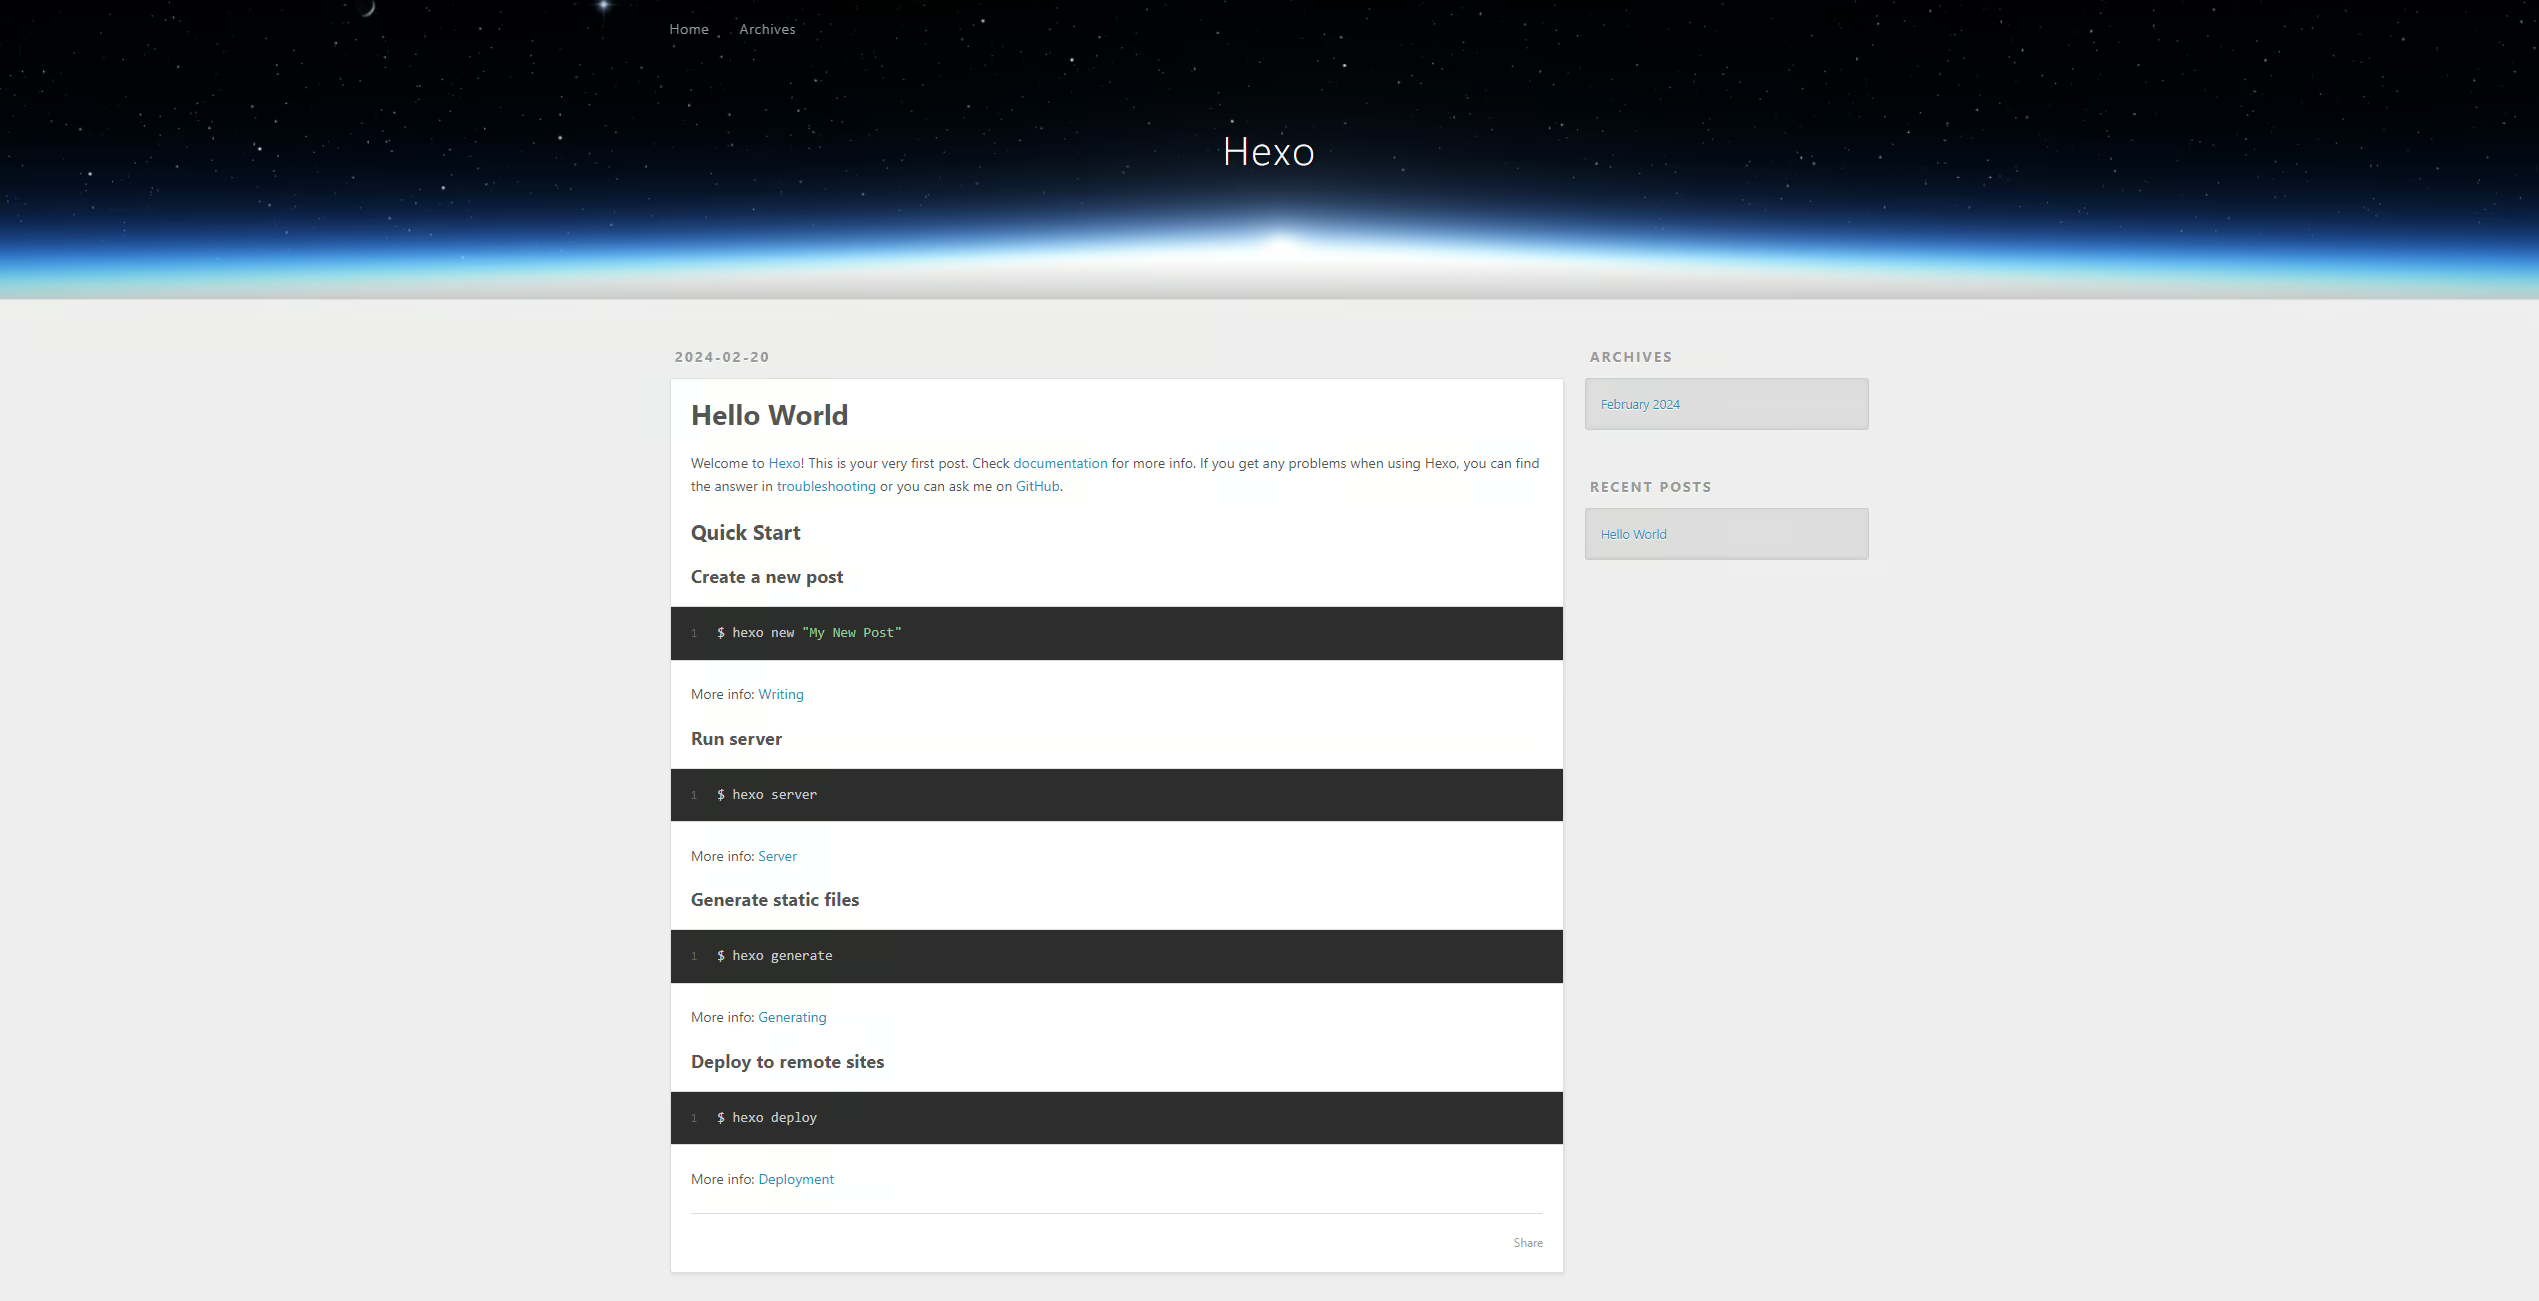
hexo generate
And to view it locally:
hexo server
The local page will be accessible at http://localhost:4000/
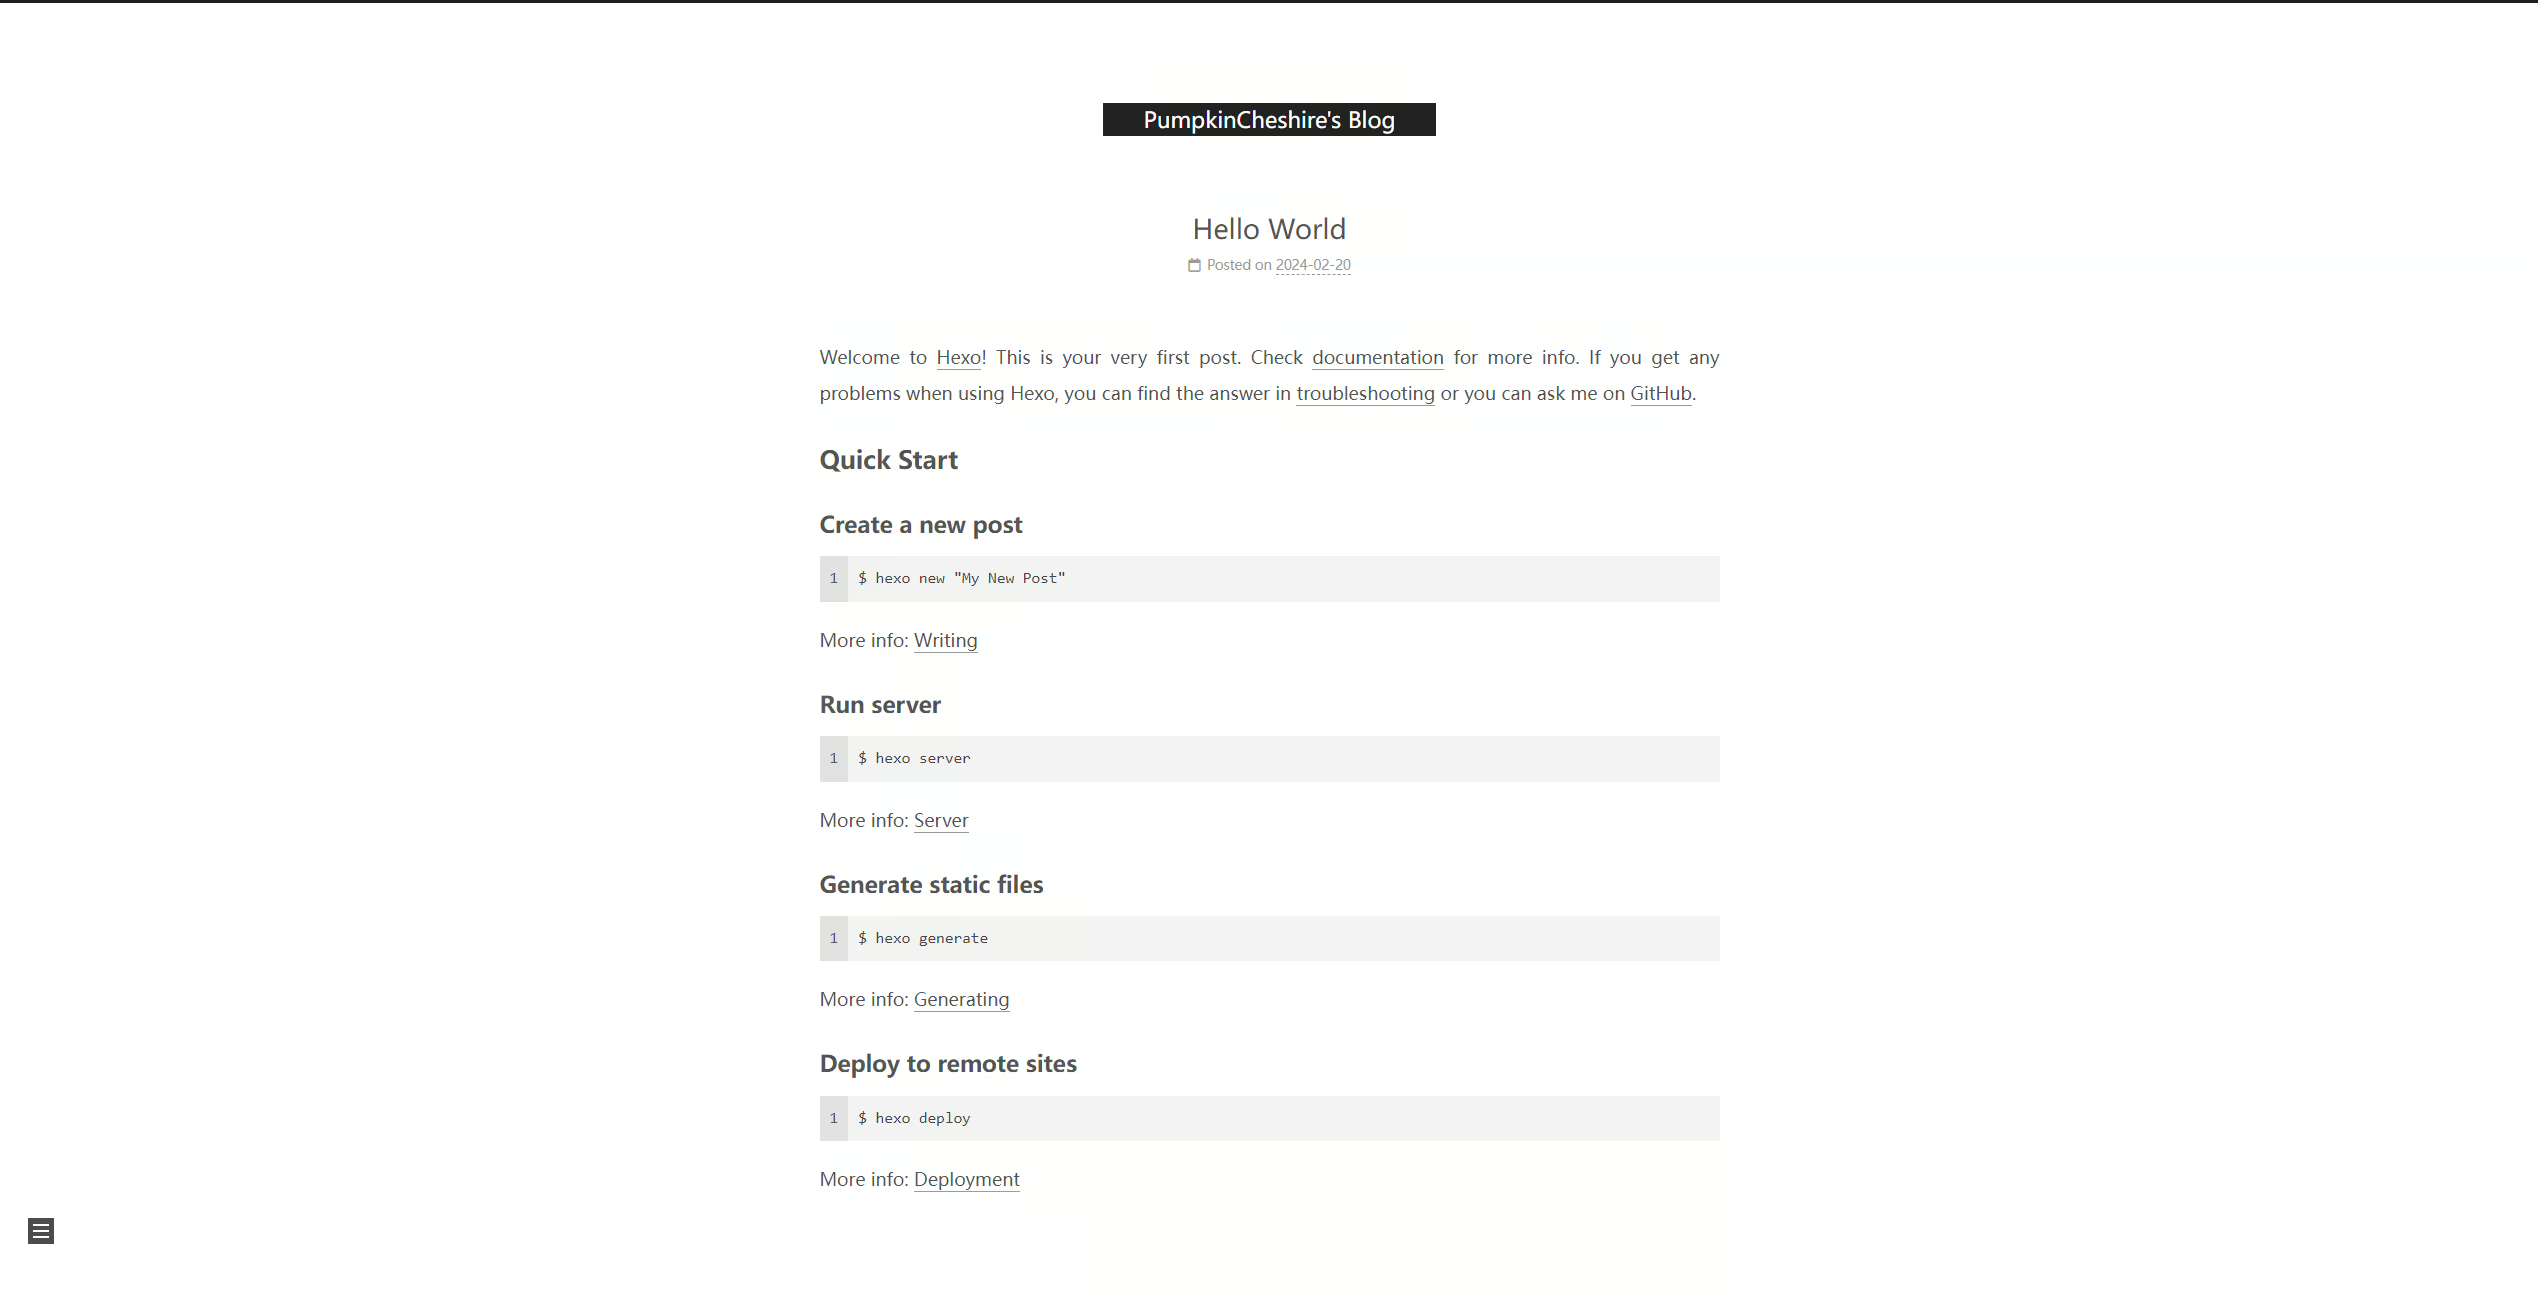
We can adjust basic configurations such as the title and URLs in _config.yml, for example:
# Site
title: PumpkinCheshire's Blog
subtitle: ''
description: ''
keywords:
author: PumpkinCheshire
language: en
timezone: ''
Choosing a Theme with Hexo - Next
For a visually appealing theme, we consider Next, a popular choice for its extensive configurations and plugins.
npm install hexo-theme-next@latest
Then in _config.yml (not the one in theme folder)
theme: next
Then run hexo server to give a look:
To customize Next further, we clone its default config file into our theme directory:
bgit clone https://github.com/next-theme/hexo-theme-next themes/next
Opting for minification and adjusting other preferences can be done as follows:
minify: true
While we might skip dark mode and custom icons for now, it's essential to know where these settings are for future reference.
Anyway, we can do these later, as long as we know where to find it.
In this blog, I may want to should a lot of math and codes, so Latex style math is important.
For blogs heavy on math and code, enabling MathJax with AMS for LaTeX-style rendering is beneficial, but it require pandoc.
# Math Formulas Render Support
math:
  # Default (true) will load mathjax / katex script on demand.
  # That is it only render those page which has `mathjax: true` in Front-matter.
  # If you set it to false, it will load mathjax / katex srcipt EVERY PAGE.
  per_page: false

  # hexo-renderer-pandoc (or hexo-renderer-kramed) required for full MathJax support.
  mathjax:
    enable: false
    # See: https://mhchem.github.io/MathJax-mhchem/
    mhchem: false
    # Available values: none | ams | all
    tags: ams

  # hexo-renderer-markdown-it-plus (or hexo-renderer-markdown-it with markdown-it-katex plugin) required for full Katex support.
  katex:
    enable: true
    # See: https://github.com/KaTeX/KaTeX/tree/master/contrib/copy-tex
    copy_tex: true
Our strong preference for using Pandoc as our renderer is due to its robust features and the fact that it's written in Haskell—a language we admire for its functional programming paradigms. However, we encounter a limitation when deploying our blog with some CI like Cloudflare Pages: their CI environment does not provide Pandoc support. This constraint forces us to compromise and continue without it, despite our preference. It's a reminder that sometimes, technological preferences must be set aside for practical deployment considerations.
npm un hexo-renderer-marked
npm i hexo-renderer-markdown-it-plus
Configs are boring! Lets deploy our page and post this article to see how it going.
Deploying with GitHub Pages
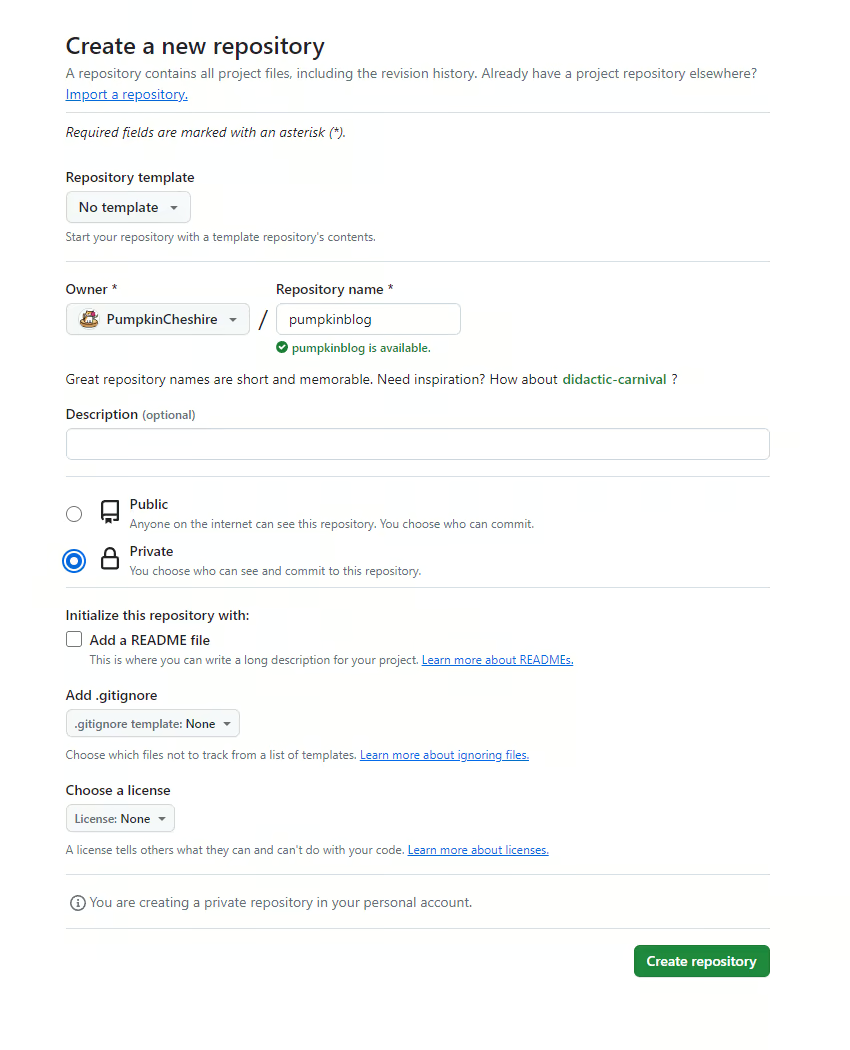
First, a GitHub repo is required:
Then, set up git in our Hexo:
git init
git add .
git commit -m "init"
git branch -M main
git remote add origin  https://github.com/PumpkinCheshire/pumpkincheshire.github.io.git
git push -u origin main
One choice is use one-step configuring deployment in _config.yml:
deploy:
  type: git
  repo: [email protected]:PumpkinCheshire/pumpkincheshire.github.io.git
  branch: gh-pages
  message: update
Deploy it, once your computer have rsa key for github, we should be good.
However, Deploying with GitHub Actions can help avoid local build inconsistencies.
name: Pages

on:
  push:
    branches:
      - main # default branch

jobs:
  build:
    runs-on: ubuntu-latest
    steps:
      - uses: actions/checkout@v3
        with:
          token: ${{ secrets.GITHUB_TOKEN }}
          # If your repository depends on submodule, please see: https://github.com/actions/checkout
          submodules: recursive
      - name: Use Node.js 19.x
        uses: actions/setup-node@v2
        with:
          node-version: '19'
      - name: Cache NPM dependencies
        uses: actions/cache@v2
        with:
          path: node_modules
          key: ${{ runner.OS }}-npm-cache
          restore-keys: |
            ${{ runner.OS }}-npm-cache
      - name: Install Dependencies
        run: npm install
      - name: Build
        run: npm run build
      - name: Upload Pages artifact
        uses: actions/upload-pages-artifact@v2
        with:
          path: ./public
  deploy:
    needs: build
    permissions:
      pages: write
      id-token: write
    environment:
      name: github-pages
      url: ${{ steps.deployment.outputs.page_url }}
    runs-on: ubuntu-latest
    steps:
      - name: Deploy to GitHub Pages
        id: deployment
        uses: actions/deploy-pages@v2
And once we push our article, the build and publish should automatically happened.
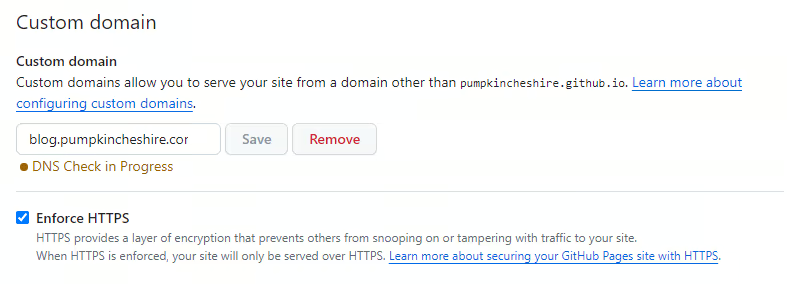
For custom domains, adding a CNAME file to the repo and configuring it on Cloudflare (or your DNS service) aligns our domain with GitHub Pages.
Publishing Content
First, we need to
hexo new "Setup Personal Blog via Hexo and GitHub Page"
And we can find the md file in ./source/Setup-Personal-Blog-via-Hexo-and-GitHub-Page.md
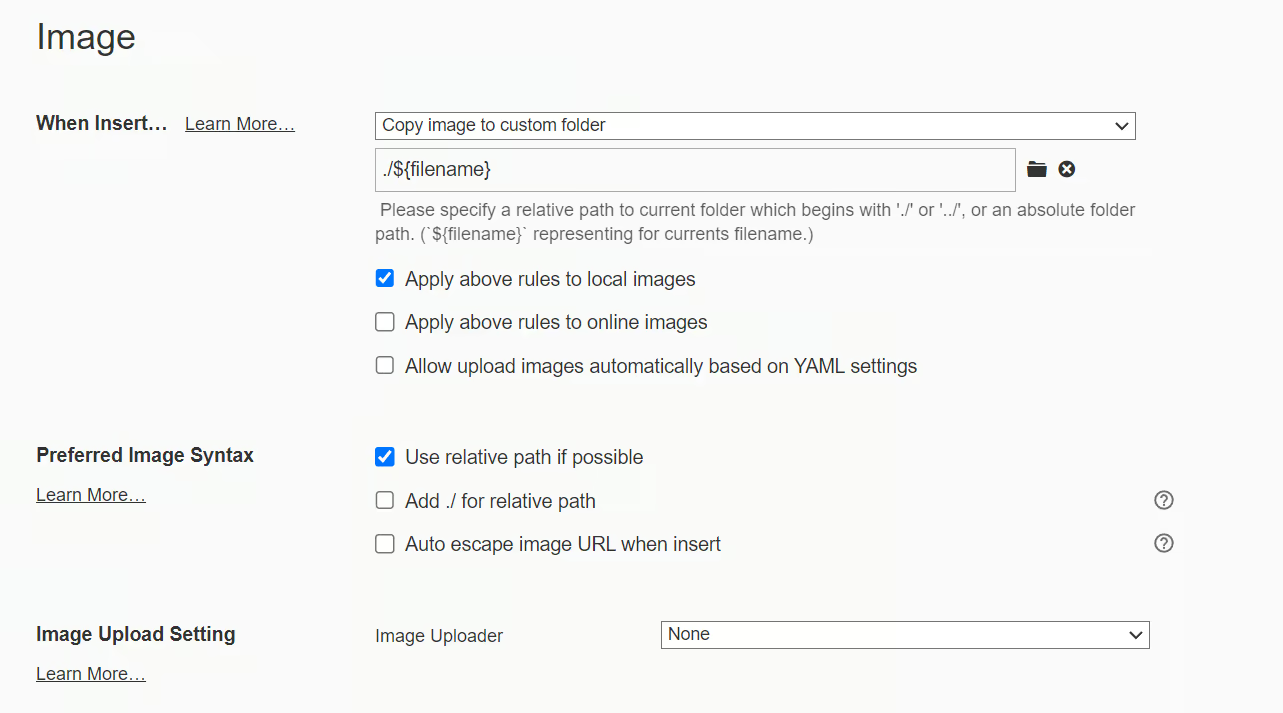
But when we got to website, we notice the image failed, we have to set the assets again.

So first, enable assets in _config.yml
typost_asset_folder: true
Then, install hexo-image-link
npm install hexo-image-link --save
Set up typora:
Build again and push to GitHub. We should be Good.
Math Test
The last thing, I want to try if math function works::